
The short answer
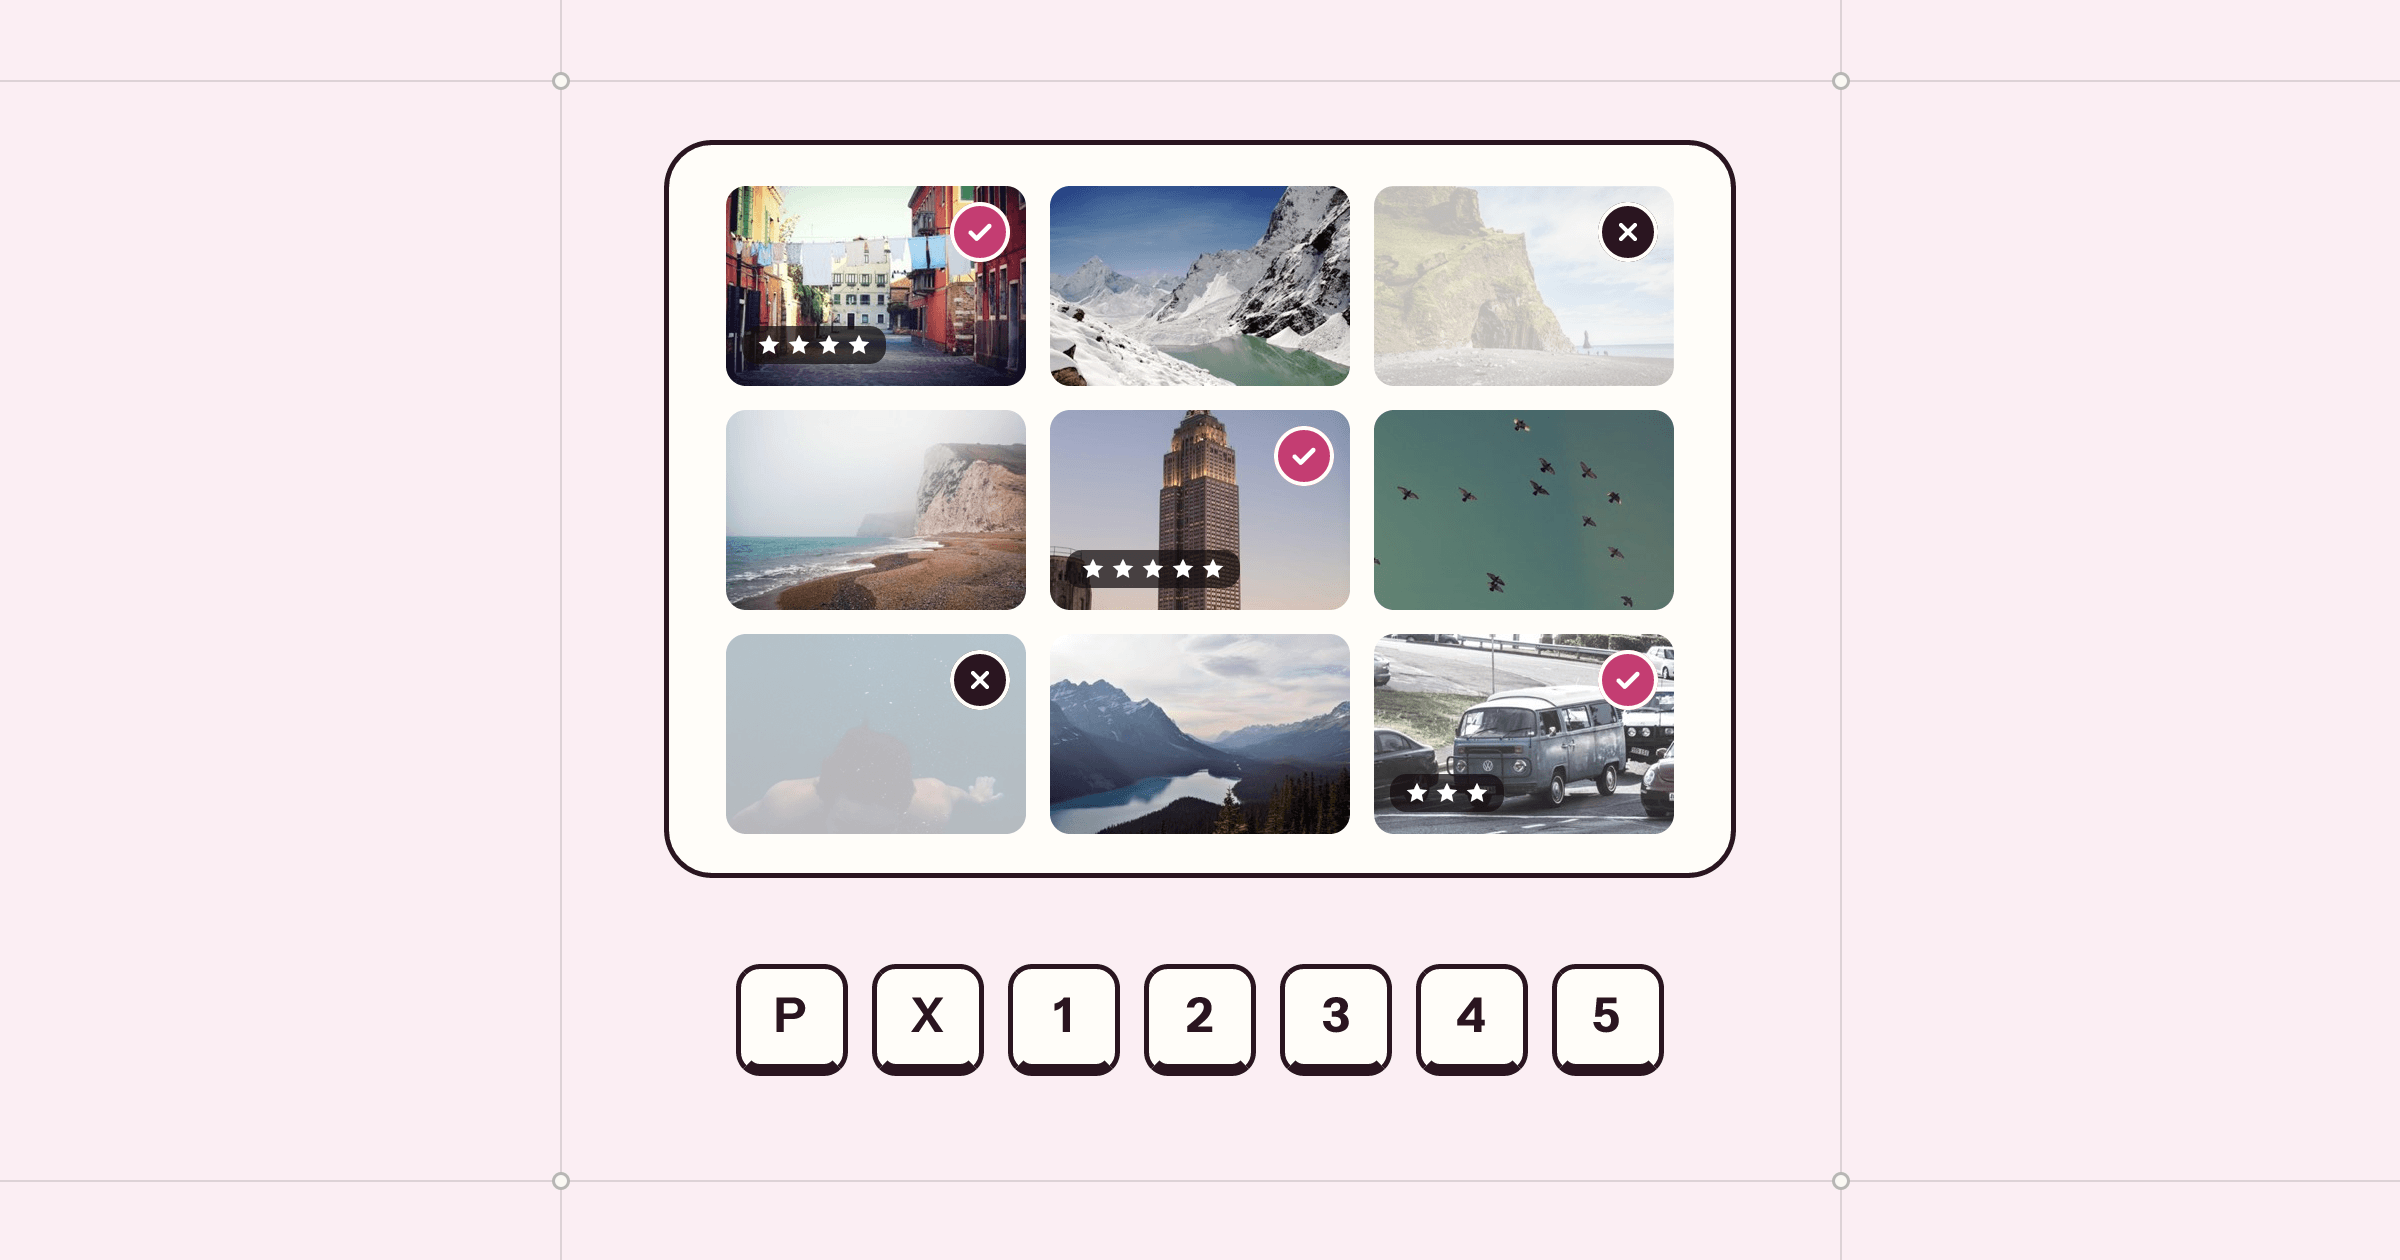
Copy the card to a folder, open the folder in a fast viewer and go through it three times: first press X on every photo that is clearly unusable, then P on the ones worth editing, then star the picks from 1 to 5. Compare near-identical frames side by side instead of flicking between them. Use an app that saves marks as XMP sidecar files, such as Lumen, so the ratings are still there when you open the folder in Lightroom, Capture One or Bridge.
You come home with 800 frames from a wedding, a match or a week in the mountains. Twenty of them are the reason you went. The job between now and those twenty is called culling, and it is the least glamorous part of photography: no sliders, no presets, just yes or no, 800 times.
It does not have to take an evening. This is the method we use, and the one we built Lumen around. It works in any viewer that is quick and has keyboard marks; where Lumen does something specific, we say so.
Why culling feels slow
Most of the time is not spent deciding. It is spent waiting: for an import to finish, for a preview to sharpen from mush to detail, for the mouse to travel to a flag icon. A decision about a frame usually takes under a second. If each photo costs you three, the tool is the bottleneck, not you.
The other cost is indecision, which comes from asking too much of each look. Trying to decide “is this a four-star photo?” on the first pass is what turns 800 frames into three hours. So split the questions up.
Before you start: a folder, not a catalog
Copy the card into a dated folder, such as 2026-10-12 Dolomites, and cull right there. There is no reason to import 800 photos into a catalog when 600 of them are about to be deleted. A folder-based viewer opens the folder as it is, RAW files included, and you only bring the keepers into your editor afterwards.
Lumen opens a folder with ⌘O or a drop on the window and shows every RAW format macOS reads, CR3, NEF, ARW, ORF, RW2 and DNG included, without an import step.
The three passes
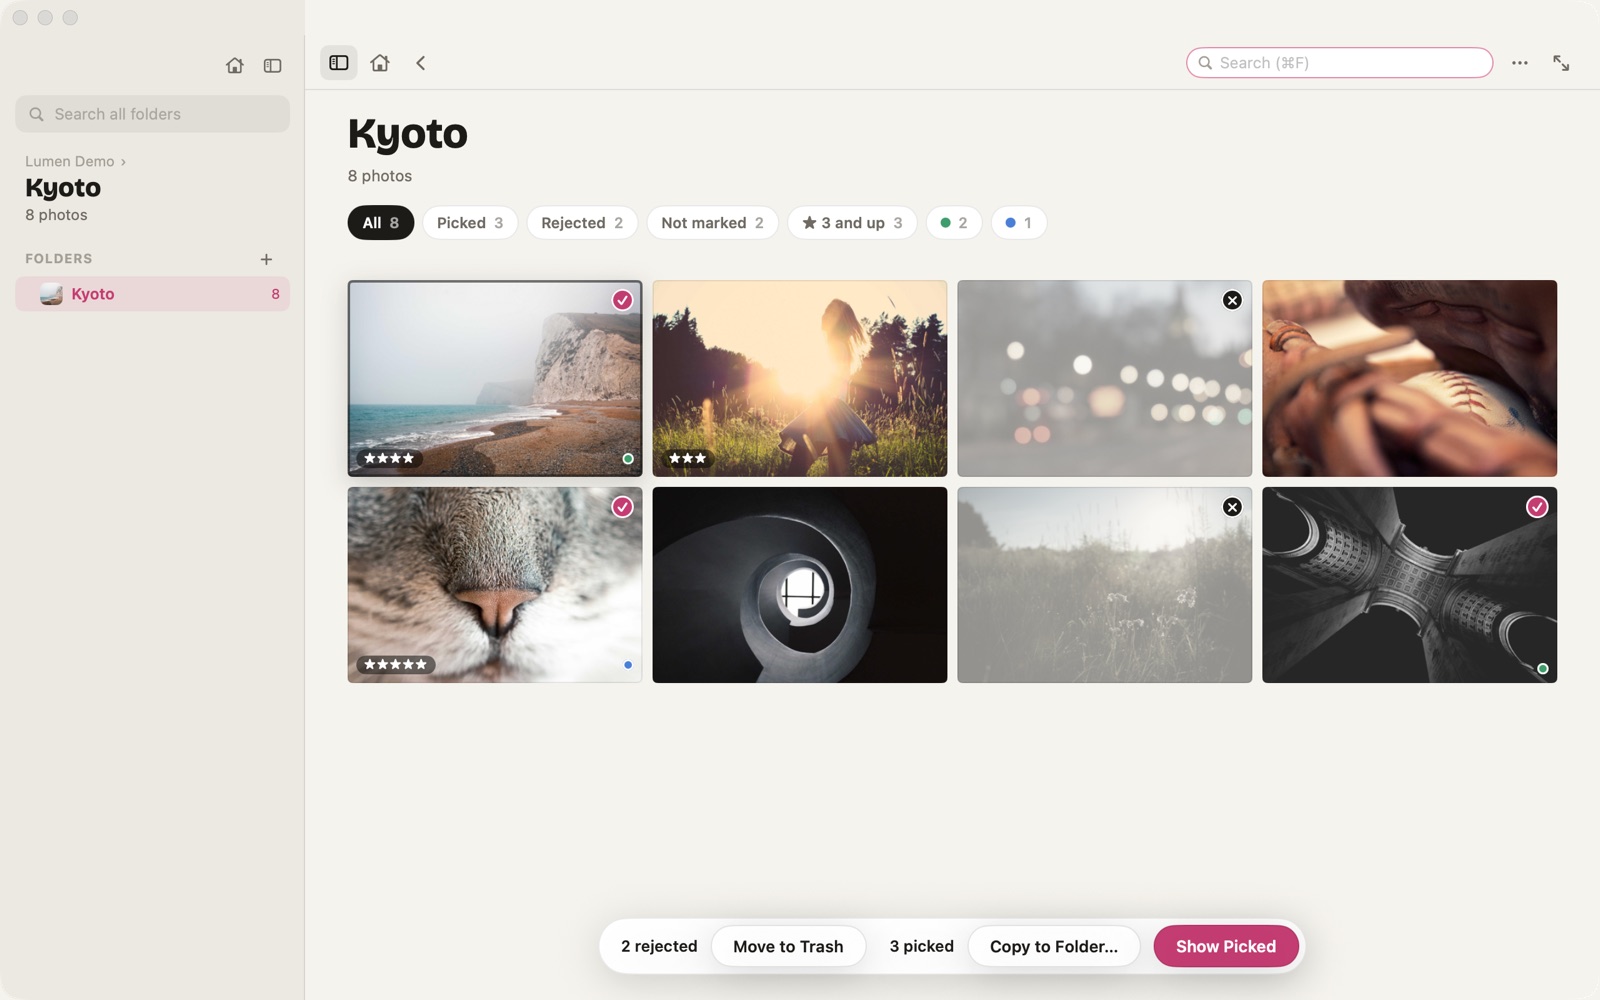
Pass 1: reject. Go through every frame at screen size and press X on anything that is clearly unusable: missed focus, eyes closed, a stranger walking through, a lens cap. Do not think about whether a photo is good. Only whether it is broken. Hold an arrow key to scrub through a burst; you will spot the bad ones in motion. In Lumen, rejected photos fade in the grid, so you can see the shape of the shoot as you go.
Pass 2: pick. Filter to everything not rejected and go again, pressing P on photos you would be willing to spend five minutes editing. Be generous. This pass is about finding candidates, not winners.
Pass 3: rank. Filter to picks and star them with 1 to 5. Now you are allowed to be slow, because there are only a few dozen. If you work for clients, colour labels (6 to 9 in Lumen) are a good way to mark which set each photo goes to.
Deciding between near-identical frames
The hardest calls are between six frames of the same moment. Flicking back and forth between them is how you lose ten minutes and still pick the wrong one. Put them side by side instead, zoomed to the same spot, and look only at what differs: the eyes, the hands, the focus on the nearest face.
In Lumen, select the frames and press Y for Compare. Zoom stays in step on both sides. Mark the side you are on with P or X, and Space keeps the winner and brings the next frame into the other side, like a knockout round. The Clean Up tab can also suggest the best frame of each burst by sharpness and exposure, and leaves the choice to you when two are too close to call.
Making your marks travel
A cull is only worth doing once. If your ratings live inside one app’s database, they disappear the moment you open the folder in something else. The fix is XMP sidecar files: small text files next to each photo that hold its metadata.
Lumen writes every mark to an .xmp file beside the photo (IMG_0001.xmp beside IMG_0001.CR3) and never writes inside the photo itself. Stars, rejects and colour labels use Adobe’s standard fields, so Lightroom reads them for RAW files and Capture One and Bridge read them for every format. Marks other apps already wrote show up in Lumen too. The one exception is the pick: XMP has no standard field for it, so picks stay in Lumen’s own field. That is a good reason to star your final set rather than rely on picks alone.
After the cull
- Move the rejects to the Trash with one click from the bar under the grid. Undo brings them back, and so does Put Back in the Finder’s Trash.
- Copy the picks to a folder for editing or delivery. Their marks go with them.
- Edit, or hand over. Take the starred set into your editor of choice, or edit in Lumen, which has RAW develop, curves, masks and healing, and saves edits beside the photo without touching the original.
Lumen runs entirely on the Mac, with nothing uploaded. It is free for 7 days with every feature, then $9.99 once. If you mainly need to open RAW files, our page on a RAW viewer for Mac goes into formats, and the help pages list every shortcut.
Questions
What is the difference between a pick and a star rating?
A pick is a yes or no: is this photo going forward? Stars rank the yeses. Keeping them separate lets you decide fast in the first passes and carefully in the last.
Will Lightroom see ratings I set in Lumen?
Yes, for stars, rejects and colour labels. Lumen writes them to an .xmp file beside each photo using Adobe's standard fields. Lightroom reads them for RAW files; Capture One and Bridge read them for every format. XMP has no standard pick flag, so picks stay in Lumen's own field.
Which RAW formats can Lumen open?
Every RAW format macOS reads, including CR3, NEF, ARW, ORF, RW2 and DNG, plus HEIC, WebP, JPEG XL and more than 25 formats in all.
Does culling in Lumen change my photos?
No. Marks go into a small .xmp file next to each photo, never inside the photo file. Files only change when you ask, for example by moving rejects to the Trash.
How much does Lumen cost?
Lumen is free for 7 days with every feature, then Lumen Pro is $9.99 once. There is no subscription.
 Almanac
 Whittle
 PennyBook